
Ozone Concentration Analyzers represent a critical vector within industrial process control and environmental safety stacks; specifically in sectors such as semiconductor fabrication, municipal water treatment, and ultra-pure water (UPW) systems. In these environments, the measurement of ozone (O3) is not merely a diagnostic metric but a fundamental requirement for process integrity. The “Problem-Solution” context arises from the inherent instability of the ozone molecule, which exhibits rapid decay and high reactivity. This reactivity necessitates real-time, high-precision monitoring to prevent material degradation in stainless steel piping or the failure of organic oxidation processes. An analyzer functions as the primary feedback loop for an ozone generator, ensuring that the concentration remains within a defined tolerance. Without these instruments, the risk of oxidative stress on infrastructure increases exponentially, leading to catastrophic system failures or “off-spec” product cycles. Consequently, the analyzer must be treated as a mission-critical node within the broader Supervisory Control and Data Acquisition (SCADA) network.
Technical Specifications
| Requirement | Default Port / Operating Range | Protocol / Standard | Impact Level (1-10) | Recommended Resources |
| :— | :— | :— | :— | :— |
| Measurement Range | 0 to 20% w/w (Gas) / 0 to 500 ppb (Liquid) | NIST Traceable | 10 | PFA Tubing / Quartz Cell |
| Data Interface | Port 502 (Modbus TCP) / 4-20mA | IEEE 802.3 / RS-485 | 8 | 1GB RAM / Dual Core CPU |
| Response Latency | < 2 Seconds (T90) | ISA-75.01.01 | 9 | High-Speed Logic Controller |
| Thermal Stability | 5 to 45 Degrees Celsius | NEMA 4X / IP65 | 7 | Thermal Insulation Jacket |
| Communication Overhead | < 64 Bytes per Payload | Modbus RTU / TCP | 4 | CAT6 Shielded Cabling |
The Configuration Protocol
Environment Prerequisites:
Before initiating the deployment of Ozone Concentration Analyzers, the lead systems architect must verify that the physical and digital environments meet specific criteria. All electrical installations must adhere to NEC Class 1, Division 2 standards if the gas concentration exceeds threshold safety limits. The network gateway requires a static IP address assignment to prevent packet-loss during DHCP lease renewals. Furthermore, ensure that the libmodbus library is installed on the integration server and that the user possesses sudo or root level permissions for modification of the systemd service profiles. PFA (Perfluoroalkoxy) or PTFE (Polytetrafluoroethylene) piping is mandatory for the sample line to ensure the integrity of the ozone flow, as standard PVC or nylon will undergo rapid oxidation, leading to signal-attenuation and false readings.
Section A: Implementation Logic:
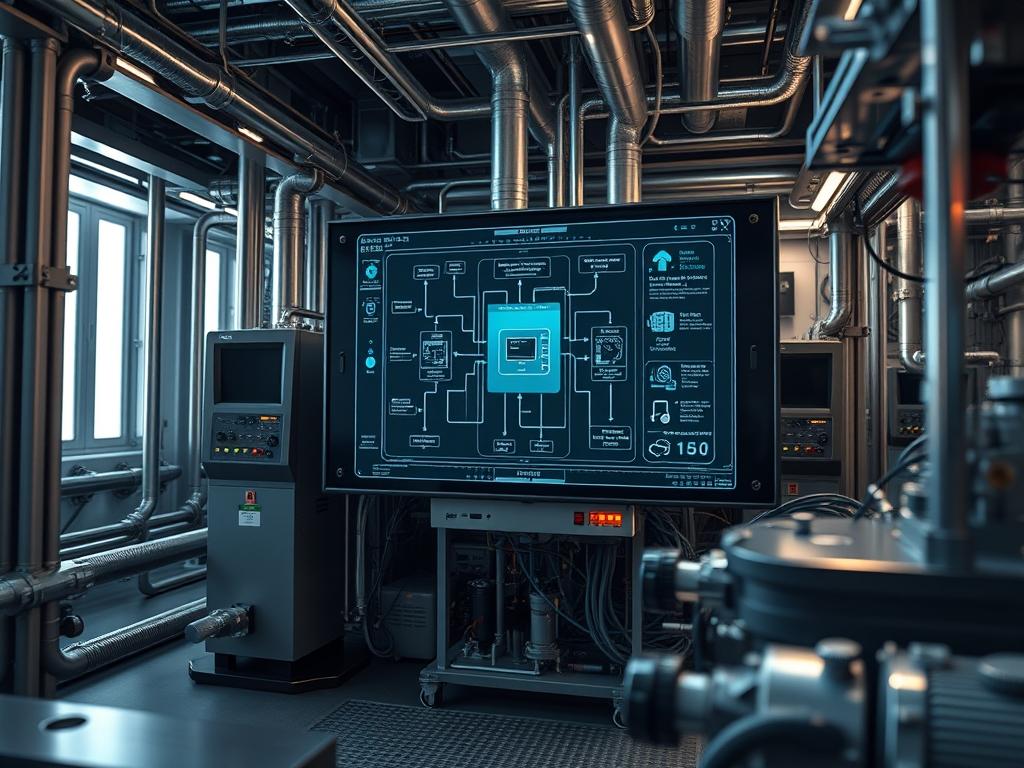
The engineering design of a high-precision analyzer typically relies on the Beer-Lambert Law, where UV light at a wavelength of 254 nanometers is passed through a measuring cell. The ozone molecules absorb this light, and the ratio of intensity between a reference sample and the process sample determines the concentration. This implementation logic requires a stable light source and an idempotent calibration routine. The analyzer must account for thermal-inertia within the measurement chamber; rapid temperature fluctuations can shift the gas density, thereby skewing the absorption calculation. To mitigate this, the system utilizes a pressure-compensation algorithm that normalizes the readout to standard temperature and pressure (STP) conditions. The data is then encapsulated into a Modbus register map, allowing for high-concurrency polling by the centralized SCADA system without introducing significant network overhead.
Step-By-Step Execution
Step 1: Physical Mounting and Isolation
Mount the analyzer unit on a vibration-dampened strut channel to eliminate mechanical noise. Ensure a vertical clearance of at least 30 centimeters for lamp maintenance.
System Note: This action prevents mechanical resonance from affecting the optical alignment of the UV lamp and photodiode, which would otherwise introduce jitter into the high-precision analog-to-digital (ADC) conversion layer.
Step 2: Pneumatic Loop Integration
Connect the sample inlet and outlet using 1/4-inch PFA tubing. Install a 0.1-micron hydrophobic filter upstream of the analyzer inlet to prevent moisture ingress.
System Note: The filter acts as a physical firewall for the optical cell. Moisture or particulate matter in the cell increases signal-attenuation, leading to a drift in zero-point calibration and potential hardware lockout by the internal logic-controller.
Step 3: Electrical and Data Handshake
Wire the 4-20mA loop to the PLC Analog Input Module and connect the RS-485 terminals to the serial gateway. Use shielded twisted pair (STP) cables to minimize electromagnetic interference (EMI).
System Note: Proper grounding of the shield at the source (analyzer side) prevents ground loops. The logic-controller interprets the 4-20mA current as a linear scale of the ozone concentration, while the digital interface provides detailed diagnostic telemetry.
Step 4: Firmware Configuration and Initialization
Access the analyzer console via the serial interface or integrated HMI. Set the Modbus Node ID and Baud Rate (typically 19200 or 115200).
System Note: Executing a systemctl restart ozoned command (on Linux-based gateways) ensures that the new communication parameters are loaded into the kernel’s serial buffer. This makes the configuration idempotent across system reboots.
Step 5: Zero-Point Calibration
Flow high-purity nitrogen or ozone-free dry air through the analyzer for five minutes. Navigate to the calibration menu and execute the “Zero Cal” command.
System Note: This sets the baseline UV intensity (I_zero) in the analyzer’s memory. It establishes the reference point for the Beer-Lambert equation, effectively resetting the internal absorption coefficient calculation.
Section B: Dependency Fault-Lines:
Systems integration often fails at the intersection of hardware and software. A primary bottleneck is gas throughput; if the flow rate is too low, the sample residence time increases, leading to ozone decay within the analyzer itself and artificially low readings. Additionally, lamp aging is a deterministic fault-line. As the UV lamp degrades over its 8,000-hour lifespan, the signal-to-noise ratio decreases. Software-side conflicts often arise from high-concurrency polling where multiple masters attempt to access the same Modbus register, causing bus contention and packet-loss. Ensure the polling interval is at least twice the T90 response time to avoid data collisions.
The Troubleshooting Matrix
Section C: Logs & Debugging:
When a fault occurs, the first point of audit is the system log file located at /var/log/instrumentation/ozone_analyzer.log. Search for specific hex codes or error strings:
– Error E01: Lamp Low Intensity: Indicates signal-attenuation exceeding 30%. Action: Clean quartz windows and check lamp hours.
– Error E04: Flow Alarm: Sample throughput has dropped below 0.5 L/min. Action: Check for clogged hydrophobic filters or PFA line kinks.
– Error E09: ADC Overrange: The analog-to-digital converter is saturated. Action: Verify the concentration is within the analyzer’s calibrated range.
To verify raw data flow on a Linux gateway, use the command tail -f /dev/ttyUSB0 | hexdump -C to view the incoming Modbus frames. If the payload is empty or malformed, check for signal-attenuation on the RS-485 line or mismatched parity settings. Visual cues on the analyzer HMI, such as a flickering “Status” LED, often correlate with power supply instability; use a fluke-multimeter to verify a clean 24VDC supply with less than 100mV of ripple voltage.
Optimization & Hardening
Performance tuning for Ozone Concentration Analyzers focuses on reducing latency and improving throughput. To optimize the data pipeline, increase the baud rate to the maximum supported by the hardware and decrease the Modbus polling interval. However, ensure that the PLC logic does not overrun the analyzer’s internal CPU. On the physical layer, maintaining a constant temperature in the analyzer enclosure via a Peltier cooler can significantly reduce thermal-inertia, leading to a more stable measurement baseline.
Hardening the system requires both physical and digital measures. Physically, ensure all gas connections are leak-tested with an electronic sniffer to prevent ambient O3 exposure. Digitally, if the analyzer is connected to a network, place it behind a dedicated firewall and disable unused services like Telnet or FTP. Use VLAN segmentation to isolate the sensor traffic from the general corporate network. For scaling, utilize a “Star Topology” for RS-485 networks with active repeaters to prevent signal degradation when expanding the count of analyzers across a facility.
The Admin Desk
How do I handle fluctuating ppb readings?
Fluctuations are often caused by thermal-inertia or pressure spikes. Ensure the sample gas is regulated to a constant 15 psi and the measuring cell is shielded from drafts. Check that the “Smoothing” or “Damping” constant is set to 5 seconds.
What is the maximum distance for RS-485 wiring?
For reliable throughput at 9600 baud, the maximum distance is approximately 1,200 meters. However, to minimize packet-loss and latency in high-interference environments, keep the cable length under 300 meters and use 120-ohm termination resistors at both ends of the bus.
Why does the analyzer report zero when ozone is present?
This typically indicates a “Saturation” or “Negative Drift” fault. If the lamp reference is set during an active ozone event, the analyzer assumes that concentration is the new zero. Perform a zero-point calibration using certified ozone-free air.
Can I use generic vinyl tubing for the sample line?
No. Ozone will rapidly oxidize vinyl (PVC) and elastomers, creating a payload of contaminants that will cloud the optical cell and cause signal-attenuation. Only use PFA, PTFE, or 316L stainless steel for all wetted components in the ozone stack.
How often should the UV lamp be replaced?
Most high-precision lamps are rated for 8,000 to 10,000 hours. Monitor the “Intensity” diagnostic register; once the value drops below 50% of the initial factory calibration, schedule immediate replacement to prevent total signal failure and system downtime.